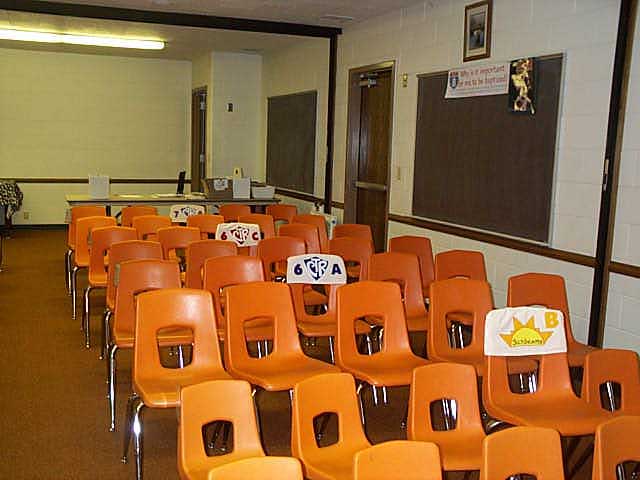
Chair Covers
Chair covers are one of those little "extras" that make a Primary room look so nice.
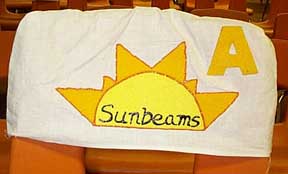
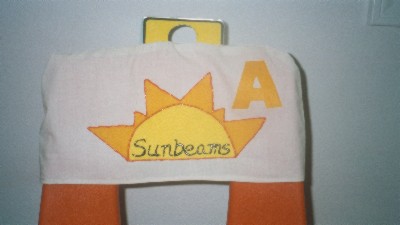
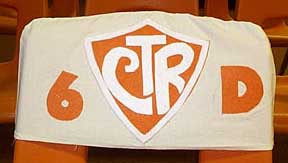
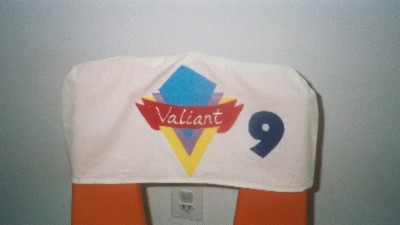
Pictures of the Different Chair Covers-- Sunbeam Sunbeam 2 CTR CTR 2 Valiant
Here's How to Make a Chair Cover:
1. I brought one of the chairs home. I just took some brown grocery-bag paper and traced around the edges of the back. It took me a couple of tries to get it right. Then I just cut out that pattern, adding on an inch or so all around the edges for a seam allowance.
2. Place the pattern on the fabric (I used unbleached muslin) and cut it out. I sewed it together and turned it right side out. I chose muslin because it's very inexpensive, and I didn't want to use felt for the actual chair covers because it would be stiffer, bulkier and had the potential to be stretched out or torn.
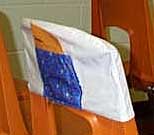
3. I added a pocket on the back, made with some pretty star fabric. The pocket is just the right size to hold door hangers and also can hold a sheet of paper folded in quarters--we put R.S. newsletters, HFPE meeting invites, etc. in the pockets. Here is a picture of the back of the chair cover.
4. For the class symbols, letters and numbers, I used felt. You could maybe use plain solid-colored fabric also, and that might work better for the "sticking power" of the symbols.
I used heat-n-bond, traced the symbols, letters and numbers on the paper of that, ironed it on to the colors of felt, and cut out the pattern.
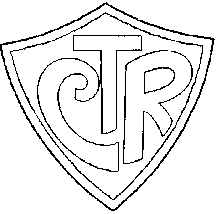
For the CTR symbol I used the pattern out of the front of the CTR manual. Here's a very rough scan of it. (you'll need to enlarge it) I did the shield itself in bright colors, and the outside outline of the shield and the letters "CTR" in white. Like the cover of the Friend from June or July of 1999. Don't forget to do the letters backwards when tracing them on the heat-n-bond paper!
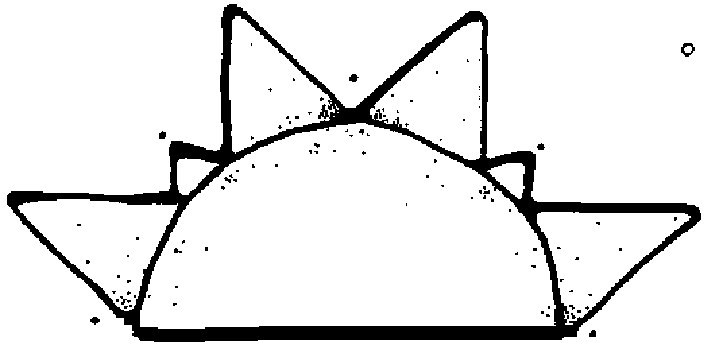
For the Valiant symbol I used a scan sent to me by Becky Poland. Here's the scan of it. Each "layer" of the Valiant symbol was made of a different color of felt. Then I ironed all the layers together. I made the Sunbeam symbol with a yellow sunshine half-circle, and a goldenrod edging of sunbeams. Here's the pattern for tracing.
The felt ironed on pretty good to itself, but I had difficulty getting it to stay on the fabric of the seat cover, so I ended up using Aleene's OK to Wash It glue on that part. BUT the fact that I had ironed heat-n-bond to the back of the felt, I think helped it hold its shape when using the glue and kept the glue from seeping all the way through the felt.
5. For the class letters and numbers (like 5A, 8, etc. I made the letters and numbers of felt with the heat-n-bond just like the symbols, but I put Aleene's Tack It Over and Over on the back of the numbers and letters. The heat-n-bond provided a good surface to put the glue on. My theory was that I could add/remove letters and numbers as needed. But the Tack It Over & Over glue works best if you are removing it every time and placing it on a piece of glass. At the end of the year when I needed to do some shuffling of numbers, they did not come off very well, and the glue left a residue. You might be better off to just use Aleene's Tacky Glue or some other washable glue.
6. For bigger words, I used Scribbles paint. For example, the word "Sunbeams" is written across the bottom part of the half-circle of the sun. The word "Valiant" is written across the "ribbon" part of the Valiant symbols. I also wrote "Boys" or "Girls" off to one side for those classes we have split into boys and girls. The CTRs didn't need any paint.
Be sure to put a layer of wax paper-covered cardboard inside the chair cover when gluing or painting.
I hope this explains it adequately, but if you have questions you can e-mail me.